 Events: input screen
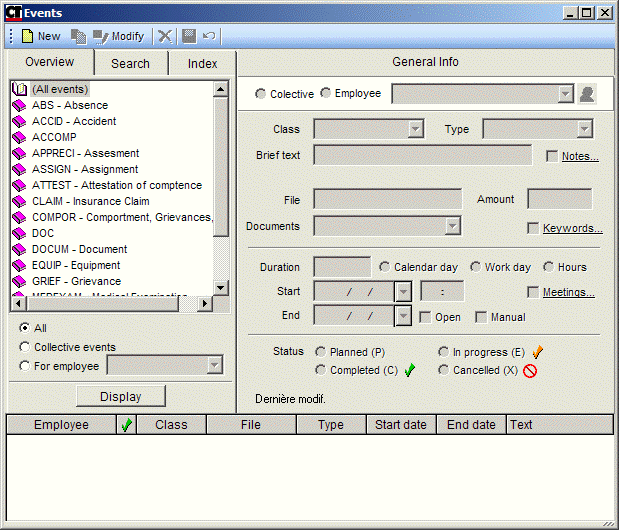
To access the Events input screen:
Data | Events... main menu
Events navigation pane
On this page
Selection of events
The left part of the Events input screen displays the search fields to select events displayed in the view window.
Overview
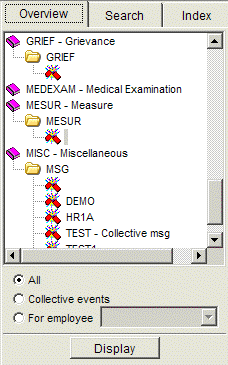
The Overview is an outline of events displayed by class, file and type. You can display the view window for events selected in the Overview by
- double-clicking one of the classes | files | types,
- clicking , after selecting a class, file or type.
All
Select this field to show that the events being searched may be collective or associated with a single employee.
Collective events
Select this field to show that the events being searched have been identified as collective events.
For employee
Select this field to show that the events being searched regard a specific employee. The name of the employee is completed using the pull-down menu to access the person selection window.
Search
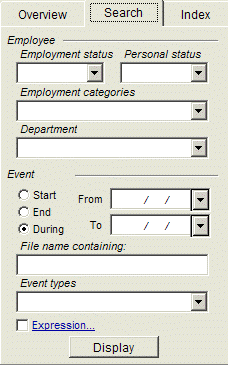
This selection window is used to search for events for a set of employees by
- clicking , after specifying one or more search criteria.
Employee
- Employment status: The pull-down menu of this field accesses a window titled Select one or more, listing the available employment status choices to add or remove.
- Personal status: The pull-down menu of this field accesses a window titled Select one or more, listing the available personal status choices to add or remove.
- Employment categories: The pull-down menu of this field accesses a window titled Select one or more, listing the available employment category choices to add or remove.
- Department: The pull-down menu of this field accesses a window listing the company's main structure (ENTITY1); a box at the bottom of the window offers the possibility of including lower levels for each of the centres listed. Select a centre by clicking on a listed choice and then clicking OK, or by simply double-clicking on your selection. In this window, you can also delete your selection by clicking Delete.
Event
- Start - From: The pull-down menu displays a calendar to enter the event start date.
- End - To: The pull-down menu displays a calendar to enter the event end date.
- During: The pull-down menu displays a calendar to enter a date between the start and end dates of the event.
- File name containing: Enter the file number to create links between events, and among events and resulting incidents.
- Event types: The pull-down menu of this field accesses a window titled Select one or more, listing the available event type choices.
- Expression: Click this option to access the Generation of a True-or-False expression to program other components.
Index
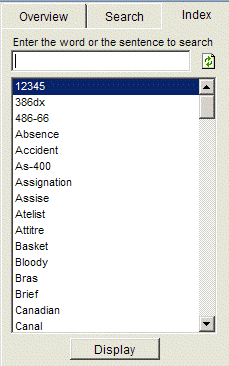
The index is a directory of keywords linked to events. You can search all the events with the same keyword by
- double-clicking one of the keywords in the Index,
- selecting a word from the Index, then clicking .
Select the
button to update the list of keywords that you have added during the year.
General Info tab
The right part of the Events input screen manages and saves general information about the event.
Collective
Select this option to specify that the event created will concern all employees or a group of employees. The Collective designation will be displayed in the Employee column in the view window at the bottom of the window.
Employee - Employee name
Select this header to specify that the event created will only concern a single employee. In this case, the field marking the employee name with an
must be filled out when the event is created.
Click the pull-down menu to open the person selection window and identify the employee in question. Once the name of the employee is completed, the iconis displayed to the right of the field. The 8employee name* will be displayed in the Employee column in the view window at the bottom of the window.
Class
The Class field, which is marked with an
, must be filled out when an event is created. Specify the class using the pull-down menu.
The Class field is the first level of classification for the Overview tab.
You may or may not have access to a class depending on the security associated with its userID.
Type
For each of the classes, you can develop a second level of grouping, called type. This field is marked with an
and must be filled out when the event is created.
The Type field is the third level of classification for the Overview tab.
Brief text
Use this field to briefly describe the event.
The expressions used in the brief text may comprise keywords displayed in the Index according to the information entered in the module's configuration options.
Notes
Click in this field to enter free text regarding the event.
File
Use this field to document the designation of the event file. The file can serve as a link between events; it is also the second level of classification in the Overview.
Note that events can be associated with an accident report by entering the report number.
The various enrollments in a training course are linked together by entering the course or group ID.
Amount
Use this field to designate the cost of the event.
Documents
Click this field to post event-related documents in a window.
Keywords
Use this field to enter keywords for the event (one word per line). The keywords entered under this header are found in the Index, as are those that appear in the Brief text field.
Double-click a keyword in the Index to do a targeted search for events containing this keyword.
The search is done on the completed expression documented at each line of the Index.
Duration
Enter a number in this field to designate the length of the event, then select a unit of measurement for the number, i.e. calendar days, work days or hours. Note that this field is for information purposes only.
Calendar day
Select this header to specify that the duration of the event is in calendar days.
Work day
Select this header to specify that the duration of the event is in work days.
Hours
Select this header to specify that the duration of the event is in hours.
Start
Use this field to specify the event start date and time, if applicable.
Meetings
Select this header to document the meetings in the window that is generated, by filling out the date, time, duration and designation of the meeting.
- Click Add to add the newly created meeting to the list of documented meetings.
- Double-click on the meeting to be modified, then click Replace to change the date, time, duration or designation of the said meeting.
- Click
to delete the data—date, time, duration and designation—of the meeting that is shown in the definition fields.
- Delete the selected meeting by clicking on the
.
The number and total duration of the documented meetings are shown at the bottom of the window.
Mouse over the word Meetings to display the list of documented meetings.
End date
Use this field to specify the event end date. If the end date cannot be closed, check the Open box.
Open
Check this box to specify that the end date is not closed—event is deemed open.
Manual
This function is not used for now.
Status
Planned: Check this box to qualify the event as planned; this status is designated in some reports with the abbreviation P (no associated pictogram, the status box will be blank in the view window).
When the created event is saved, an event confirmation of status window is displayed.
If you check the Do not know box instead of one of the status choices offered, the
pictogram is displayed in the view window, showing that the start date is past and that the event end date is either past, unknown or open and that the event has not been deemed cancelled, completed or in progress.
•In progress: Qualify the event as in progress by checking this box; this status is designated in some reports with the abbreviation E or by the
pictogram.
•Completed: Qualify the event as completed by checking this box; this status is designated in some reports with the abbreviation C or by thepictogram.
•Cancelled: Qualify the event as cancelled by checking this box; this status is designated in some reports with the abbreviation X or by thepictogram.
Last modif.
The date of the latest modification and the identification of the person who made the change will be displayed.
Viewing events
The view window at the bottom of the input screen lists all the events in the selected file. Access an event on the list by double-clicking the desired line.

Employee
•This column displays the name of the employee documented in general info, if the event only concerns a single employee.
•This column displays the word (Collective) if the event concerns a group of employees or all employees.
Status
shows that the event has been cancelled.
shows that the event has been completed.
shows that the event is in progress.
(blank) shows that the event is planned.
shows that the start date is past, that the end date of the event is past or unknown and that the status of the event has not been updated to Cancelled or Completed.
Class
This column displays the class of the event documented in general info.
File
This column displays the file of the event documented in general info.
Type
This column displays the type of the event documented in general info.
Start date/End date
•The Start date column displays the event start date.
•The End date column displays the event end date; the box is blank if the end date is not closed.
Text
This column displays the brief text documented in general info.
© Carver Technologies, 2025 • Updated: 08/16/25

 Events: input screen


