 Walk-through 1: Hire a new employee
PERS and JOBHIST overview
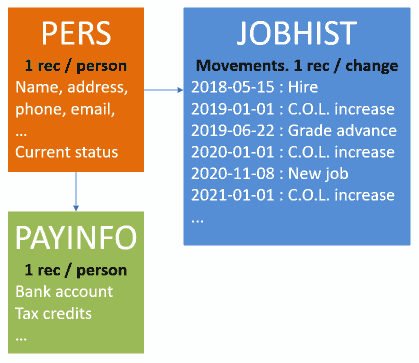
For every employee in Umana, past or present, you will have...
- A unique Person (PERS) record with their current status.
- Multiple Employment History (JOBHIST) records, as they progress through their career at your company. Every time their status or salary changes, a new record (movement) is created.
- A Payroll info (PAYINFO) record with direct deposit, exemptions, and other payroll info.
In this lesson we learn how to hire a new employee.
Links on this page
...lead you to more details on a topic. Ignore them for now; just read the topic straight through. Come back to them later when you are ready.
Is this for me?
This topic is for both HR and payroll users. Hiring employees is typically an HR function, but often payroll staff will do this as well. It's important for everyone to understand.
Assumptions
For this lesson, we are assuming that Umana has already been set up with movement codes, department structure, status codes, etc.
In a later lesson you will learn how to create you own codes.
Hire a new employee
Let's start out by hiring a new employee. Open Umana and work along with us in the steps in this lesson.
There are 3 initial steps to hiring a new employee:
- Create a new PERSON file
- Create a new hire movement in EMPLOYMENT HISTORY
- Fill in the PAYINFO screen
Enrolling the employee in benefits is an important HR function which will be covered in here
1. Create a new PERS File
On the side menu bar click on PERSON

In the Select Person window, click on Create New Employee on the right
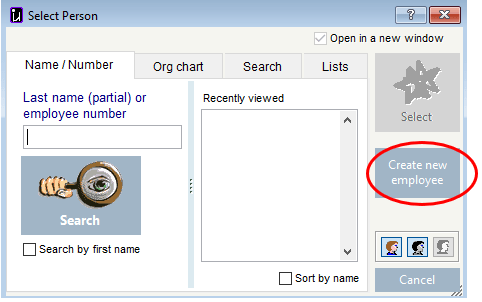
This will open the PERS window where you add the new employee's personal information.
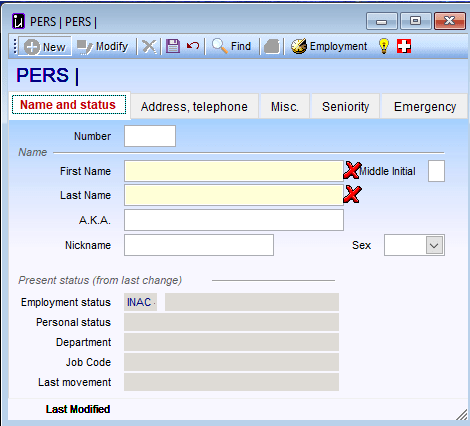
 All fields marked with an
  are mandatory — they must be filled out.
Name and Status tab
- Only the top half of the screen needs to be filled out.
The bottom half is populated when you create the new Hire movement in Employment History. - The employee number can be left blank and the system will assign the next available number or you can assign one yourself.
Address, Telephone tab

- Enter the employee's address and postal code, telephone numbers and emails. See Check-boxes of data.
- The province code will default to the company's province but you may choose another province from the drop-down list.
Telephone numbers:
Home and mobile are already labeled. There is an additional phone number field available to which you can assign another label.
User ID
- Enter the Umana user logon Id for this employee, if they have one. This is the employee's user-id in the Umana USERS module (Admin > Users), and makes the link between the USERS module and the PERS module.
- It is only used for employees who will use Umana themselves, so you can worry about later. Typically this would be the same as their Windows logon-on id.
MISC tab
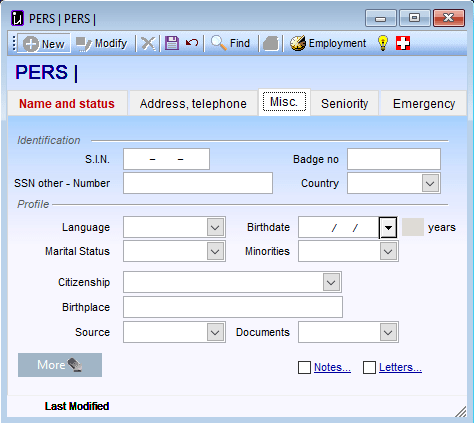
- Enter the new hire's S.I.N here as well as the his/her birth date. All employees in Canada are required to have a valid S.I.N. for their tax documents and R.O.E.
- The birth date is required for the correct calculation of CPP/QPP deductions and is often used to determine eligibility for some Benefits.
- You can also identify the employee as being part of a visible minority for Statistic Canada purposes.
- You may want to fill in the recruitment source for your own hiring statistics.
- If you click on the down-arrow of Documents, you can add documents (their C.V. or a reference letter for example) to the employee's file. See Attaching documents.
Seniority tab
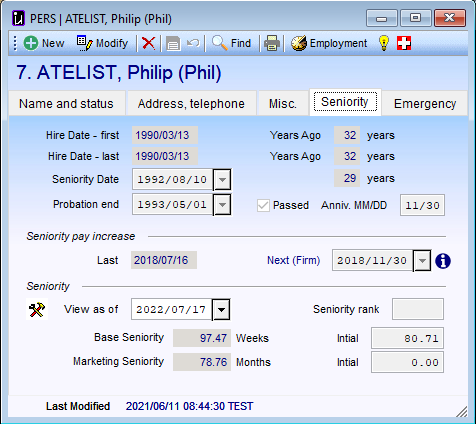
- Seniority date If the seniority date is different from the Hire Date, you can override it here.
- Probation end The probation period can be configured to be calculated automatically (based on a date or hours worked), or you can enter it manually here. See Probation Periods
Emergency tab
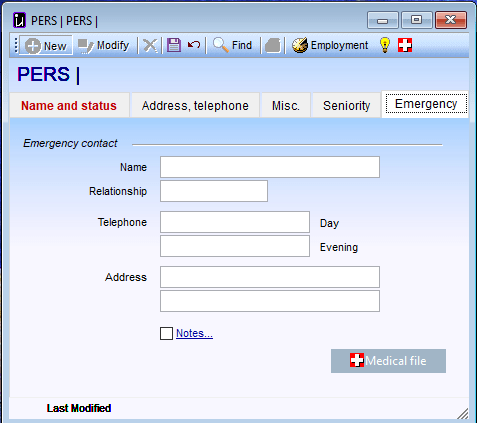
- Enter the Emergency contact info here
- You can also enter the employee's Medical info by clicking on Medical file.
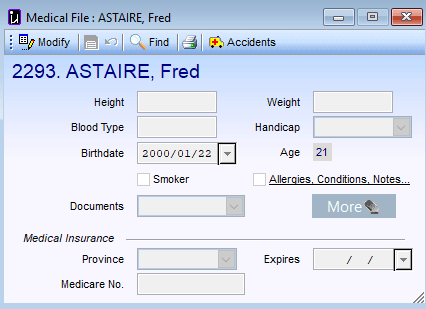
Notice that the birth date and age were carried over from the MISC tab.
You may want to check SMOKER if it applies as this often has an impact on the Benefit premiums.
2. Creating a hire movement in Employment History
The next step is to actually 'hire' the new employee that we have just created.
Click on  on the top toolbar of the Person window to access Employment History
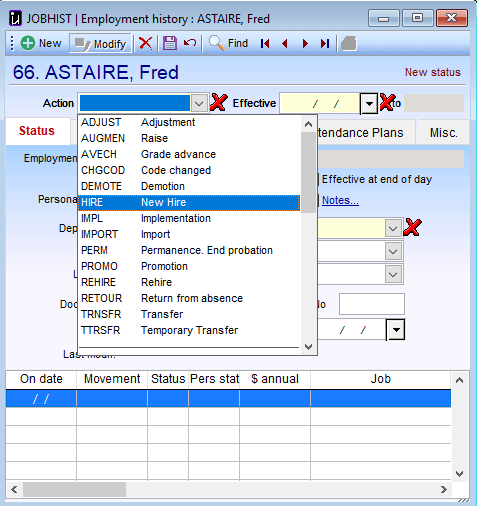
 The fields marked with an
  must be filled out.
Status Tab
In ACTION Select HIRE New Hire to create the New hire movement.
Next fill in the New hire date in th Effective date field
Note that the Employment Status automatically becomes Active and the Personal status automatically becomes Permament. That is because these statuses were configured into the New Hire action in the JACTION table.
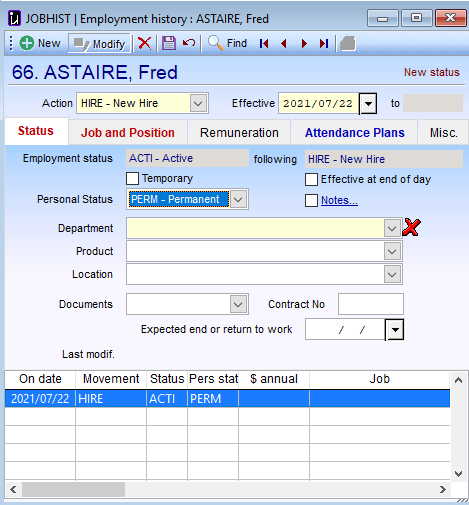
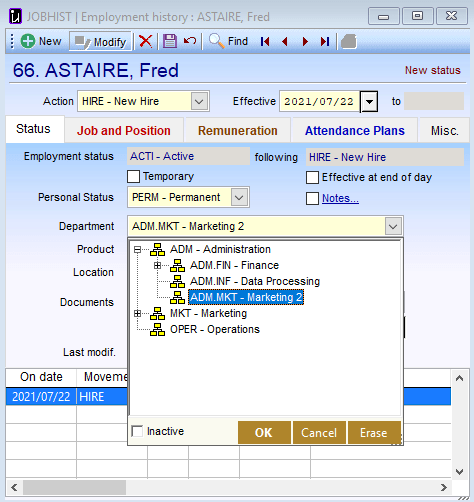
Next assign a Department from the drop down list.
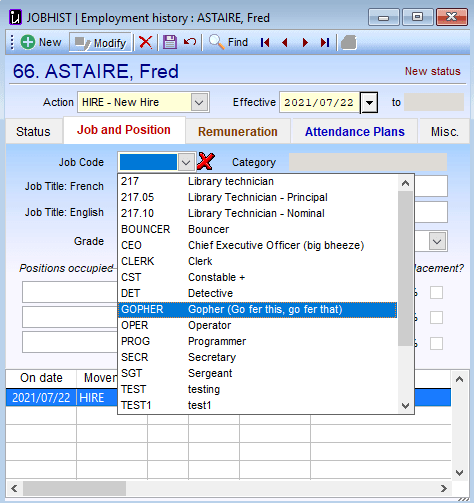
Job and Position Tab
Next assign the employee a Job from the drop-down list.
This will populate the Job title fields, the category and grade. All of these were configured according to the Job code selected.
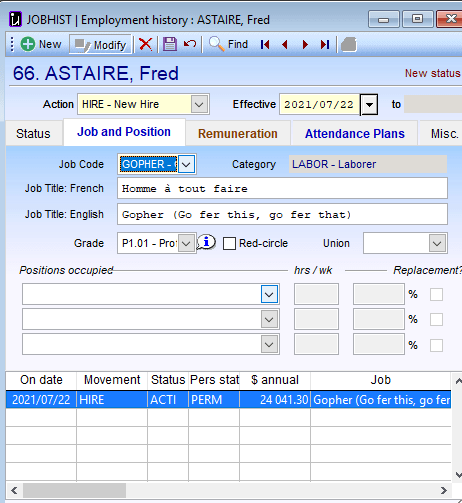
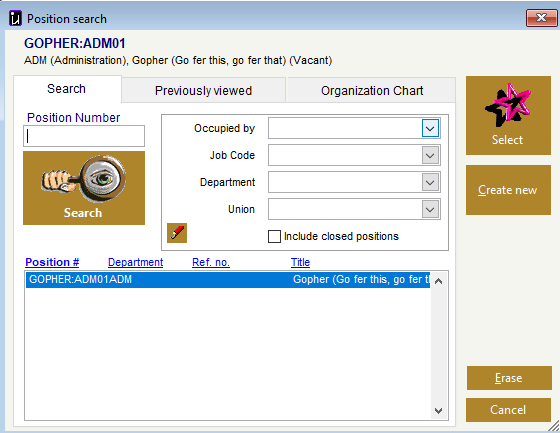
If your company uses Positions you can select the position from the drop down window
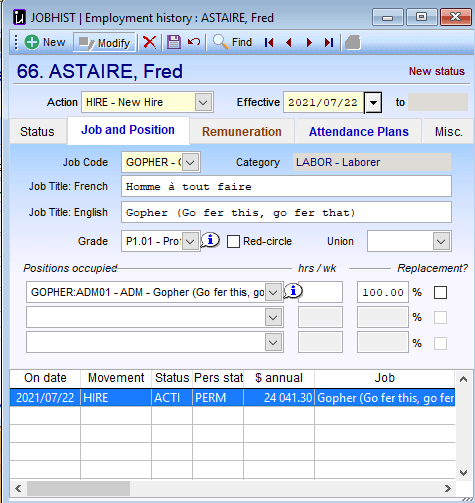
Notice that on the bottom half of the screen the system has created a New Hire history with all the details including salary and Job.
Remuneration tab
As you can see the system has automatically populated the salary fields from the selected Job. All you need to do here is assign a work schedule
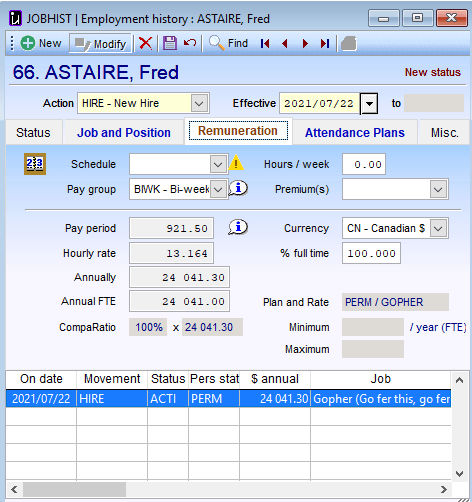
You will notice the  mark next to Schedule. Click on it to open a window that will ask if you wish to automatically assign a base schedule based on the selected Job.
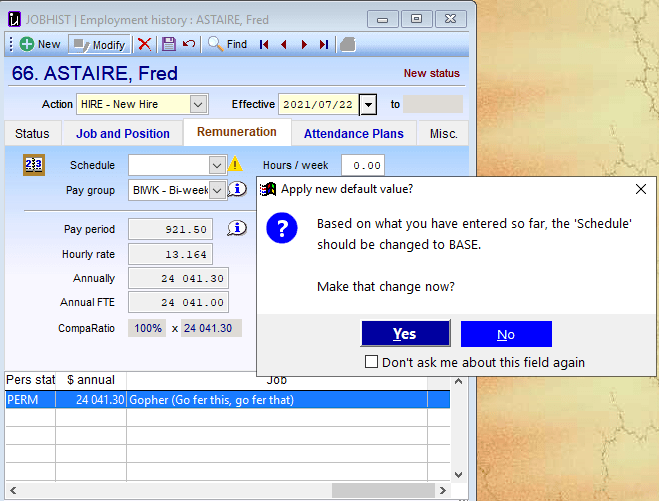
You can answer Yes to accept the base schedule or choose another from the drop down list. You can even assign a personal schedule unique to this employee.
Attendance Plans tab
The system will automatically populate the various banks plans according to the Job selected.

Misc Tab
The system will automatically populate the Manager and Department managed according to the Job selected. You can always override these from the drop-down list.
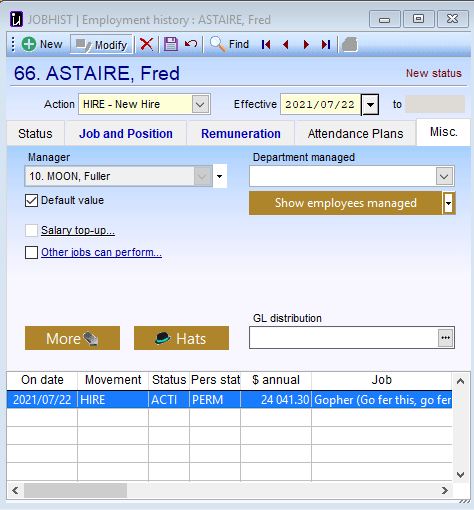
When everything is finished **Click on to save.
3. Fill in the PayInfo screen
The Pay Info screen contains the employee's banking information for direct deposit of his pay as well as tax credit amounts.
To access, on the side tool bar click on Pay Info

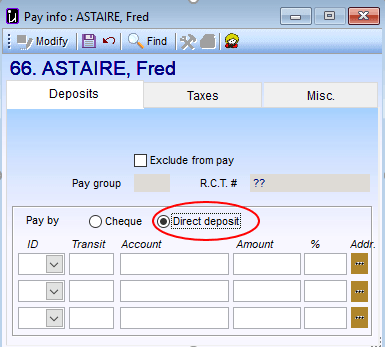
Deposits tab
Click on Direct Deposit and enter the employee's banking information in the fields below.
Taxes tab
The system will default single tax credits for the federal and provincial tax bodies. You can check other options, add additional credits, or withhold additional tax, if the employee has filled out a TD1 form so requesting.
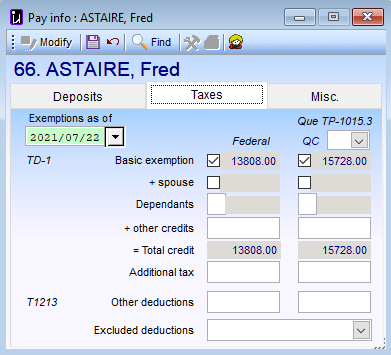
You can specify Excluded deductions (click the drop-down) for an employee who does not pay certain taxes.
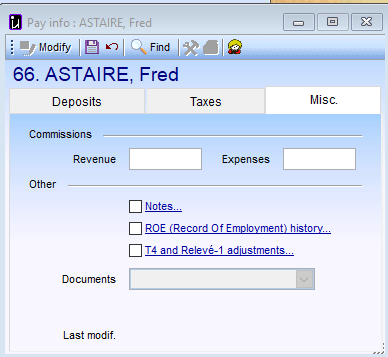
Misc tab
If your employee is paid on commissioned, you can enter his/her estimated annual earnings and expenses for tax calculation purposes.
When you are finished be sure to click on
to save your information.
© Carver Technologies, 2025 • Updated: 09/02/21

 Walk-through 1: Hire a new employee
